Filters are rules automatically applied to Security Alerts (events).
Events are sent by the detection engine to the Dashboard. Upon arrival, all filters are evaluated and, if at least one matches, the event is marked as filtered.
Filtered events have a distinct badge on the Events page and do not trigger push notifications.
Filtered events are always visible in the Dashboard; they won’t disappear!
Why Use Filters
The intended use is suppressing alerts under particular circumstances, for example:
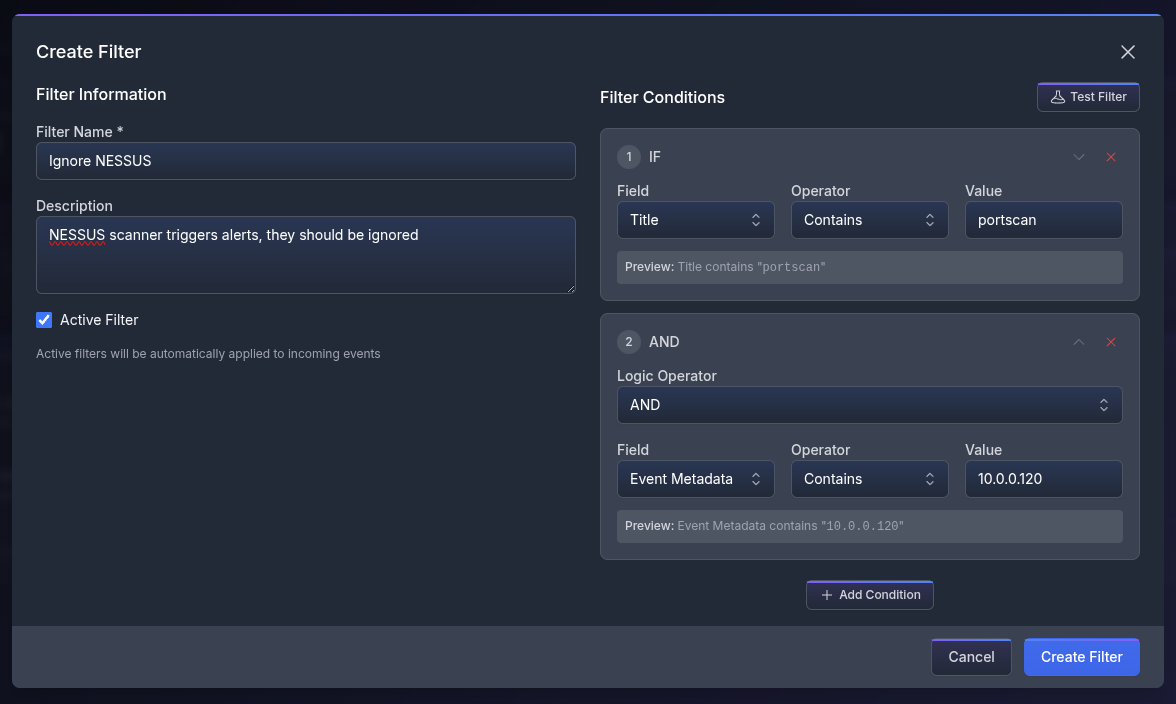
- A security scanner like NESSUS doing scheduled port scans will trigger the honeypots. Instead of having to set an exception there, you can simply suppress the event.
- The Detection Engine sends summaries of attacks. For example, a Bruteforce Critical event is triggered after N failed attempts and dispatched immediately. At the end of the attack, the Engine sends a summary, for example: “SSH attack sequence from 10.0.0.100 completed with 200 total attempts”. The initial alert is enough for detecting the threat, while the summary provides additional intel.
- Temporarily suppressing all alerts when inspecting the honeypots. You are more than welcome to see the honeypot’s internals, but lots of events will be triggered. This goes against our TOS with a Managed Plan, as it needlessly wastes our analysts’ time.
Creating a Filter
Filters can be created via the “Create Filter” button and have the following fields:
- Name, a human-readable name.
- Description explaining what the filter does — optional.
- Active/Inactive checkmark to enable or disable the filter.
- Filter Conditions, the actual rule.
Multiple filter conditions can be added, and they follow standard logical matching.
- The “Field” defines what part of the event should be used: Title, Description, or Metadata.
- The “Operator” is the logical operation used to match a value. They can be: Contains, Equals, Starts with, Ends with, or Regex.
- The “Value” is what the operator is evaluated against. It can be text or a regex.
The first added filter uses an IF logical operator. If a match is found, the event is suppressed.
Additional filters require an explicit “Logic Operator”: AND, OR, NOT.
The event is suppressed only if the whole logical expression results in TRUE.
Managing Filters
From the main section, you have a quick overview of the defined filters: their name and description, whether they are active, and how many conditions they have.
Beyond the standard View, Edit, and Delete actions, you can also “Test the filter” by clicking the icon next to the conditions or from the Edit modal.
When testing, you can choose from pre-made samples or fill the fields with custom data. After running the test, you will see which conditions are applied and the outcome of the logical expression.