Notifications are real-time push messages sent to third-party platforms.
We do not use notifications to communicate with you; we only send security alerts.
Instead of having to constantly check the Dashboard’s events, you can have some or all alerts immediately forwarded to your phone. This is particularly useful for customers under the Self Service Plan.
It’s important to know that only non-filtered events are dispatched. Refer to the filters page for further information.
You can have as many Notification Channels as you like.
Creating a Notification Channel
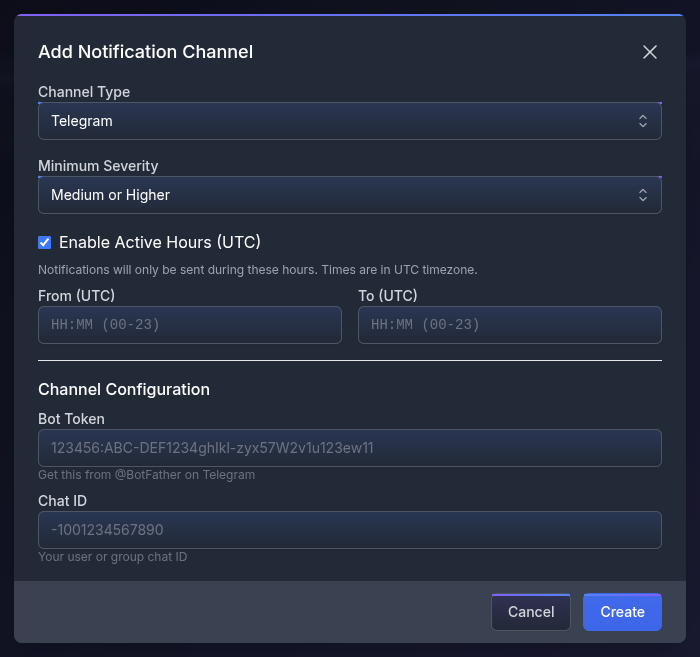
To create a Notification Channel, click the button in the top-right. A modal will open where you can choose:
- Channel Type: Email, Microsoft Teams, Google Chat, Slack, Telegram, Discord, or Custom Webhook. Upon selecting a channel, additional fields, discussed later, become available and are required for it to work.
- Minimum Severity. Only events matching or surpassing the set severity are dispatched through the channel.
- Active Hours restrict the channel to defined hours. The format used is 24-hour UTC.
Managing Notification Channels
In the middle section, there’s an overview of the defined channels and the action buttons: Toggle Enable/Disable, Test Channel, Edit, Delete.
We strongly advise testing the channel after creation and after any change.
Notifications will not be dispatched to disabled channels or outside active hours.
About Active Hours
Receiving security alerts only during defined hours might seem counterproductive, especially given they are lost - not queued.
The intended use for this feature is to define who receives notifications and when.
Since multiple channels can be set, even duplicates of the same exact channel, this allows multiple individuals or teams to receive alerts at specific time intervals during the day and night.
This enables 24/7 overwatch on a precise, customizable schedule.
Recommended Minimum Severity
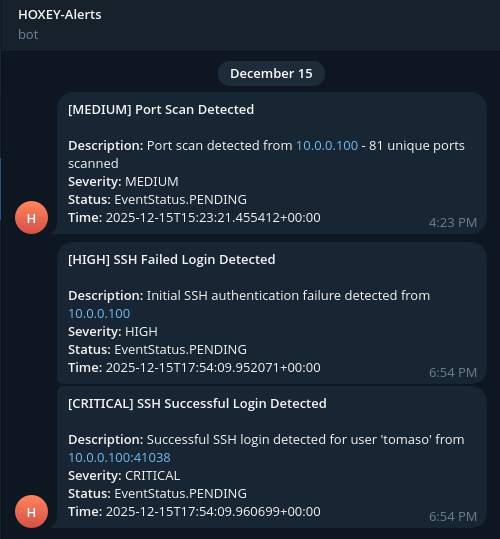
Our alerts do not follow the standard severity ranking because honeypots are passive and act like traps.
For example, a successful RDP/SSH login on a real system is usually classified as Info or Low. On honeypots, it’s Critical.
We recommend setting either a minimum of Medium or High severity.
- Medium Severity notifies very suspicious behavior at the network level, not necessarily directed only at the honeypot.
- High Severity has almost 100% accuracy; some Medium events can be escalated to High automatically under certain circumstances.
- Critical Severity has no margin of error and means someone is inside the honeypot!
In a typical SMB network, anything at or above Medium should be carefully triaged. If another legitimate system triggers alerts, set a filter and suppress the IP.
Configuring channels
Microsoft Teams
- In Teams, go to the target Channel → ⋯ → Connectors
- Add Incoming Webhook
- Name it and save
- Copy the generated Webhook URL
Google Chat
- Open the Space (room)
- Space settings → Apps & integrations
- Add Incoming webhook
- Name it and copy the Webhook URL
Slack
- Go to Slack API → Create App
- Enable Incoming Webhooks
- Add a webhook to a specific channel
- Copy the Webhook URL
Discord
- Server → Channel Settings → Integrations
- Create Webhook
- Name it and copy the Webhook URL
Telegram Chat API
Create a bot & get Bot Token
- Open @BotFather in Telegram
- Send /start → /newbot
- Name it → choose username
- Copy the Bot Token (looks like
123456:ABC-DEF...)
Add bot to your chat
- Open the private chat / group you want
- Add the bot to the chat
- For groups: give it permission (at least Write messages)
Get the Chat ID
- Send any message in that chat
- Open in browser:
https://api.telegram.org/bot<BOT_TOKEN>/getUpdates
- Find
"chat":{"id": ...}- Private chat: positive number
- Group chat: negative number (e.g. -1001234567890)
You now have Bot Token + Chat ID!